Summer is all about fruity delights. Cherry pies are no exception. The sweetness of the cherries with the crispiness of the crust makes it a perfect delight. Simply yum!
Be it for your family or yourself, cherry pies are a must this summer! But let’s face it, not all recipes can give you that satisfaction. So we noted down the best one of all. That will quench your tastebuds. Let’s check it out-
- Level: Intermediate
- Serving Portion: 5 servings
- Preparing Time: 30 minutes
- Baking time: 50 minutes
- Total time: 1hr 20 minutes
Nutritional Facts( Per Slice):
| Calories | 465 |
| Total Fat | 22.5g |
| Saturated Fat | 11.5g |
| Cholesterol | 25g |
| Protein | 4g |
Necessary Cooking Equipment
For making this delicious cherry pie, you will need a few extra types of equipment. They are-
- 8 to 9-inch baking pan
- Pizza cutter or knife
- Cherry pitter
Ingredient List
- 4 cups of frozen or fresh cherries
- 1 to 1 ½ cups of granulated sugar
- 1 tablespoon of fresh lemon juice
- 4 tablespoons of cornstarch
- ½ teaspoon of cinnamon
- Pie dough from your favorite recipe
- 1 1/2 tablespoons of cold butter, to dot
- 1 tablespoon of sugar, to sprinkle
Step-by-Step Instruction For Cherry Pie-
Got your tools and ingredients ready? Then let’s jump into the recipe!
Step 1: Prepare The Filling
First and foremost, get your cherries ready. To get rid of all the cherry seeds, use a cherry pitter. This will ensure a smooth texture for your filling. Use the cherry pitter above your sink. That way, there will not be any mess from the cherry juices.
After that, transfer your cherries to a big bowl. Then toss it with a big amount of fresh lemon juice. Then whisk together the cornstarch, granulated sugar, and cinnamon in a separate dish.
Once mixed, transfer it to the bowl of cherries and mix it in. Keep mixing it until any white residue from the corn starch is not visible.
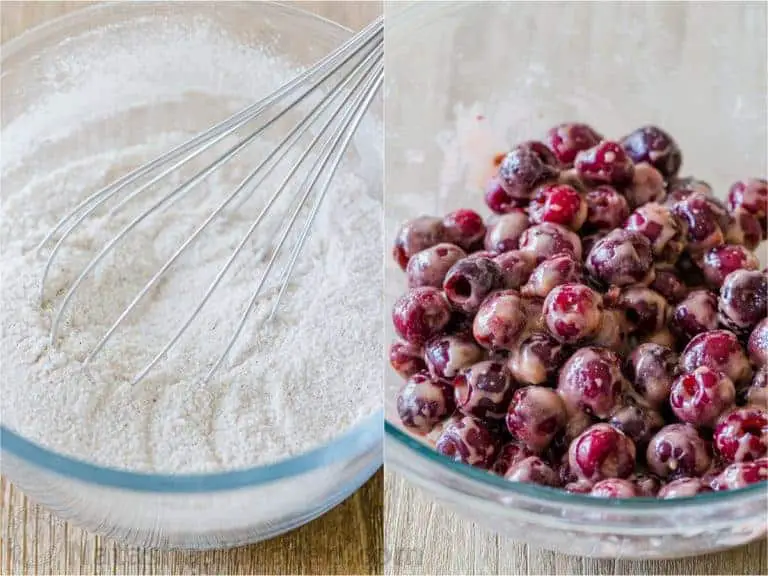
Step 2: Prepare The Crust
It is time to keep your cherries aside and prepare the crust. Remember to chill your dough for 1 hour before you begin preparing it. You can use any of your favorite dough recipes. You can even use store-bought ones.
Layout your dough over a flour-covered surface. Use a roller pin to start spreading it out. Evenly roll out in all directions to get a smooth surface.
Once you’re done, shift it over your baking pan. Make sure to leave out extra sides in the pan to get a clean edge.
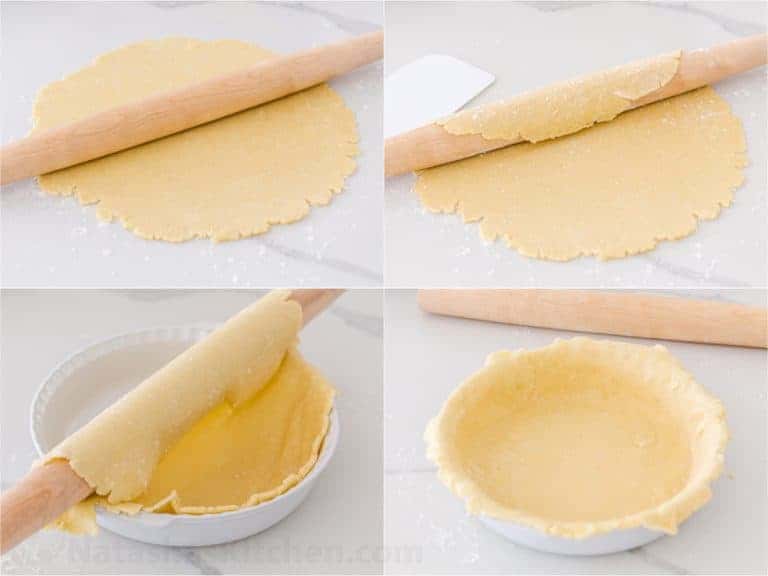
Step 3: Put In The Filling
Now that you are done with the crust, put in the filling. Take your cherry mixture and pour it evenly into the pan.
Make sure to also include the accumulated juices of the mixture. Then take some diced cold butter and spread it over the top. And set it aside.
Step 4: Cover The Pie
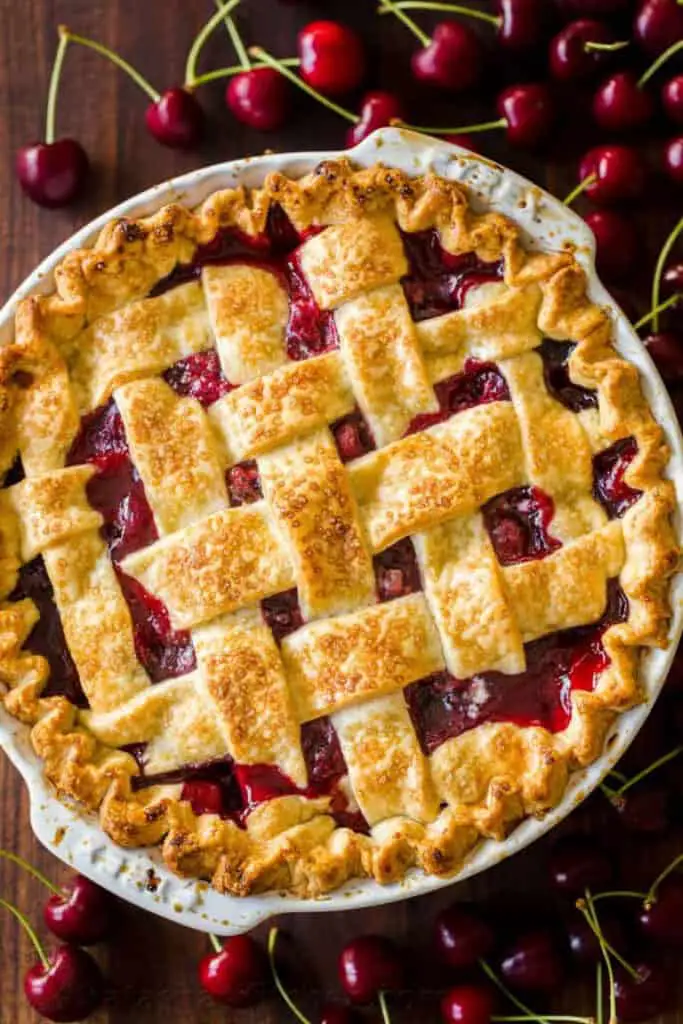
Take another chilled dough and roll it out. This dough will be used for the covering of your pie. Use a pizza cutter or a knife to cut out long strips. Place them over your pie surface in a criss-cross pattern. You can also cut it out in any other design of your choice.
Once done, tuck in the extra pie dough all around the edges. Make sure to gently pat down the edges so they don’t get brown too quickly. Then put the pie in the freezer till your oven gets preheated.
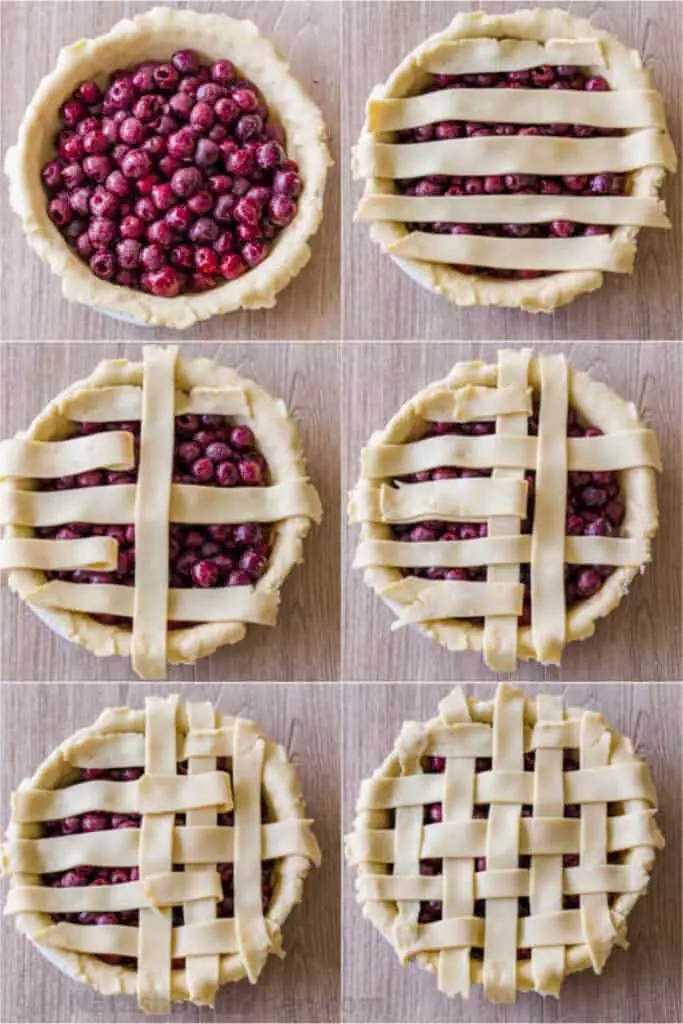
Step 5: Time to Bake!
Preheat your oven to 425 degrees Fahrenheit. Once preheated, take your pie out of the freezer. Before you put it in, brush it with an egg and milk mixture. Take one beaten egg and mix it with one tablespoon of butter or milk. Brush the mixture over the pie. Then sprinkle it with some sugar.
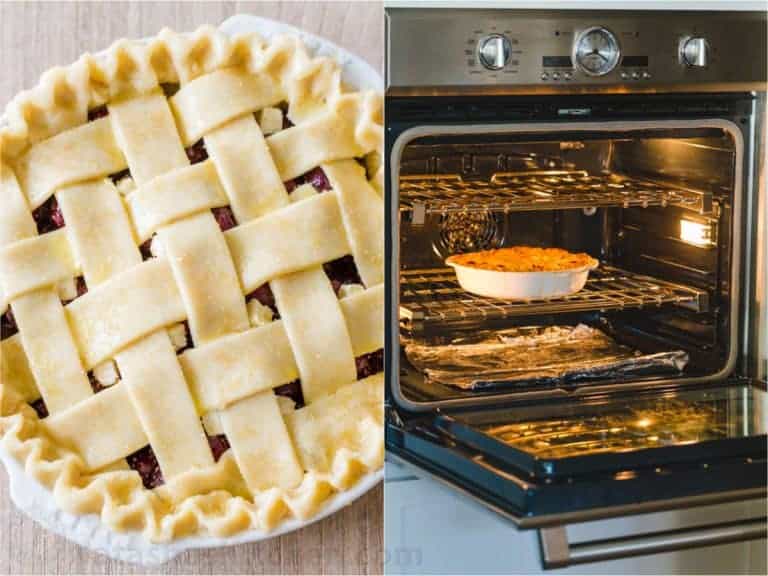
Step 6: Take the Pie Out Of The Oven
Place the pie in the lower middle section of your oven. And bake it for 50 minutes. Or until you can see cherry juices coming out.
Once taken out, let it cool down completely. It might take around 20 minutes. That way the cherry juices will be stickier and easier to cut. It’s best served with a spoonful of vanilla ice cream.
Some Important Tips-
If you follow our instructions, you will be able to carry out the recipe hassle-free. But in case you’re facing problems, check out these tips.
How Do You Thicken Cherry Pie Filling Without Cornstarch?
You can use flour instead of cornstarch, which is the best option. Double the amount of flour you’d use for cornstarch. The thickening effect will be the same. However, if you add too much flour, your filling may become too pasty and cloudy. It may also leave a distinctive flour taste.
Does Cherry Pie Need To Be Refrigerated?
After you’re done with the baking, let your pie cool down. Then serve it. You don’t need to refrigerate it for that. But if you have leftovers, refrigerate them. It will stay fresh for three to four days.
Should I Defrost Frozen Cherries For Pie?
You should. Frozen berries will release excess water in the oven. This may end up ruining the recipe. If you want to defrost it, you can put it under running water. Or in the microwave, if you want to use it right away.
We hope you liked this recipe and try it out yourself. We tried to make it as simple as we can for your better understanding.
- How Long Does Vegan Butter Last? Mystery Solved - January 9, 2024
- How Long Does Vegan Mayo Last - January 2, 2024
- From Pot to Plate: How Long Does Vegan Chili Last in The Fridge? - December 26, 2023


