
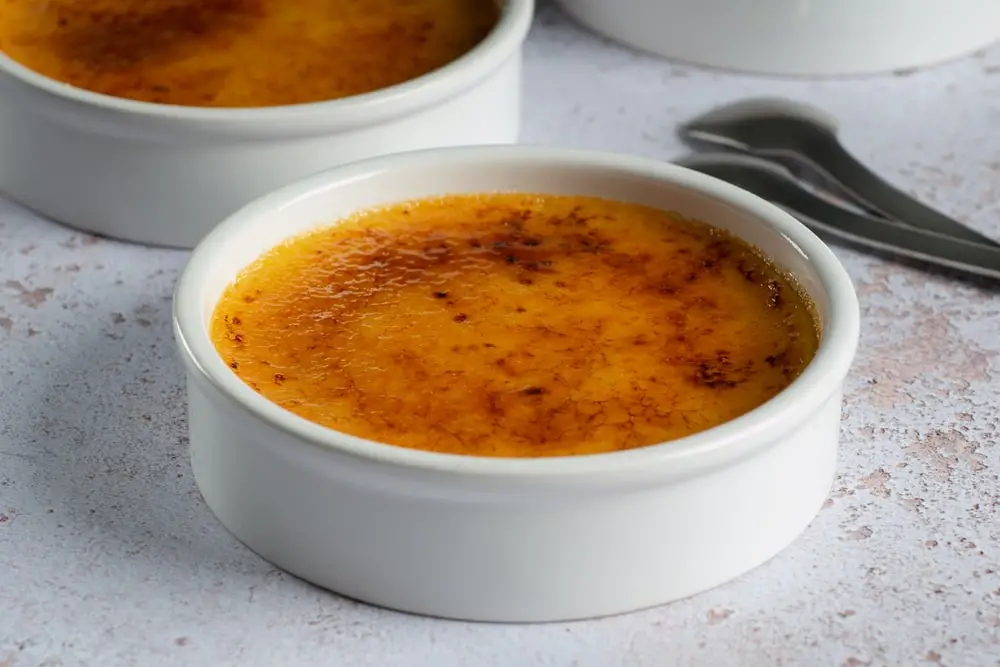
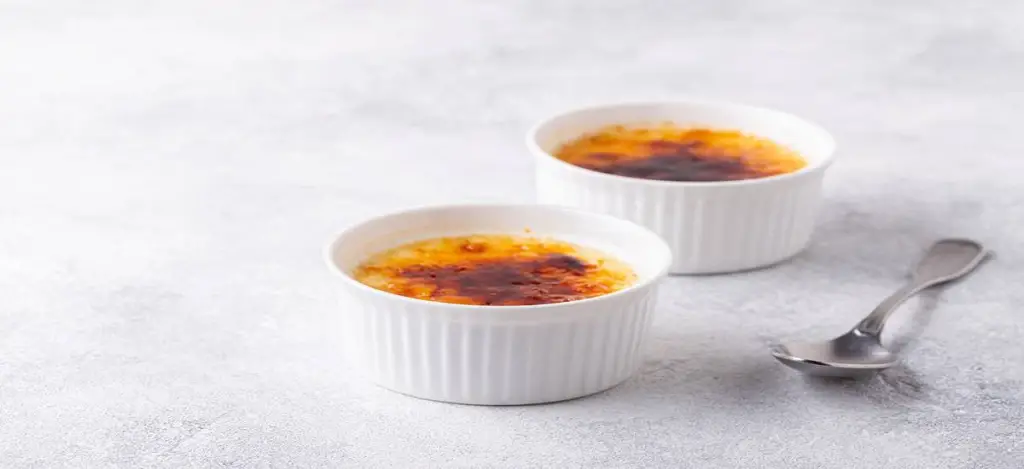
It’s frustrating when you find it difficult to set your creme brulee, isn’t it? But, hey, don’t fret! There is a solution to your problem, and this guide will look at this from an in-depth perspective.
So, why is your creme brulee not setting?
There are various reasons why your creme brulee is not set, such as when you don’t set sufficient yolks in the mixture. The creme brulee will remain in the unset state. Plus, failing to cook it correctly can also lead to a mess.
How Do I Know if a Creme Brulee is Not Setting
You can use various ways to determine where creme brulee is not setting. You have to ask a few questions about the appearance of the sauce.
Does it look runny or soupy? If the answer is yes, you will realize the sauce might not have set as required. However, there is a solution to this issue.
Below is a list of four main problems that might be the leading cause for your creme brulee not setting:
Reason #1. Failing to Use the Right Cream Ratio
Egg yolk and cream are essential when you want to prepare a creme brulee. However, some bakers aren’t aware of the specific amounts of each ingredient that someone should use. The issue can happen when you mix up your recipes.
However, there is one single factor you should consider – we recommend using three egg yolks for each cup of liquid in the setup. A good example would be when you use 2 cups of heavy cream, consider using nine egg yolks.
If your mixture involved the half and half portion of cream, you might have to start this process again. The reason is that the half and half cream has lots of water or liquid. It can cause the custard to contain lots of water, especially if you don’t regulate the amounts.
Therefore, we recommend that you use heavy cream as an alternative. If you plan on using the half approach, consider using up to 5 egg yolks for the best results.
Reason #2. The Cooking Time
The average cooking time of creme brulee is crucial in whether it cooks the right way. Cooking the creme brulee hastily will cause it to become undercooked and runny. It might also lead to flakiness and make your creme brulee wiggly.
The best temperature level for your creme brulee should average 300 degrees Fahrenheit. Once you handle this, ensure you bake it for 30 minutes.
You also have to ensure that the internal temperature of the creme brulee gets to the 160 degrees Farhenheit level. Therefore, ensure you always track the cooking time and temperature of your creme brulee for the best results.
Reason #3. Did The Cooking Process Go as Required?
Just as we had suggested earlier, there are various recipes that you can use for preparing creme brulee. Usually, these recipes have varying requirements, which you have to consider.
However, expect your first batch of creme brulee to come out inconsistent. You may have to consider a few perspectives first to help ensure that your next few tries come outright.
The first step is to ensure you get the right ramekins. Any large or small ramekin won’t apply to your recipe.
The next step is to use the correct hot water bath. Specifically, set the mixture filed ramekins in the hot water pot. Otherwise, the creme brulee won’t set as you had planned.
Ensure you use the right amount of water, often halfway up to the ramekins. In addition, ensure you are cautious when setting the pan in the oven for the best results. The reason is that any water seepages might also lead to the creme brulee not setting issue.
Reason #4. Lack of Sufficient Freezing
Once the baking process is complete, ensure you let the creme brulee sit in the fridge for a few hours. Specifically, let the pie sit in the refrigerator for 3 hours for the best results.
The period will provide the best environment for your creme brulee to set. Ensure you place it in a well-organized fridge to avoid compromising it with unusual flavours.
4 Steps Involved in Unsetting Creme Brulee
There are various key steps to consider when addressing the creme blue insetting issue:
Below are the resources you need for this process:
| Product | Purpose | Link |
| Glass container | For setting the creme brulee and the custard. | Rubbermaid Brilliance Glass Storage |
| Metal strainer | For sieving the creme brulee. | Cuisinart CTG-00-3MS |
| Set of ramekins | To set the creme brulee. | DOWAN 4 oz Ramekins |
| Ovenproof pan | For baking the creme brulee. | All-Clad D3 Stainless Cookware |
| Hot water | For heating the creme brulee as you prepare it. | N/A |
| Double boiler | For the hot water bath. | 1000ML Upgrade Double Boiler |
| Insulated spatula | For whisking and working through the creme brulee. | Silicone Spatulas for Nonstick Cookware |
| Bowl | For mixing the ingredients. | |
| Temperature probe | To determine whether the creme brulee hits the right temperature. | KIZEN Digital Meat Thermometer with Probe |
Once you source these resources, consider the steps involved in setting creme brulee the right way:
Step #1. Scrape of the Creme Brulee Custard
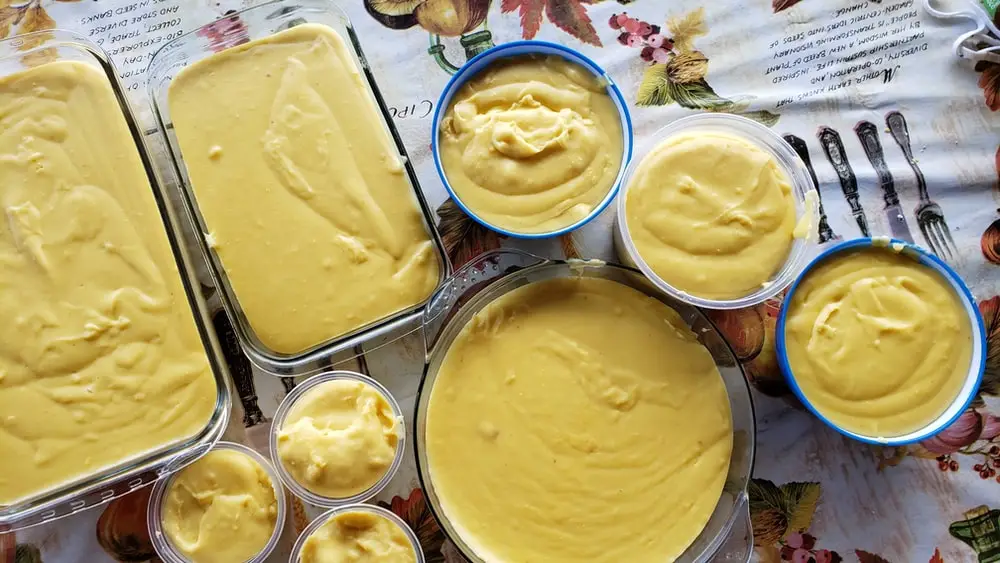
The first challenge most people come across in setting Creme Brulee is ensuring that the custard sets correctly. Hence, you have to be cautious in setting the custard for the best results.
The best way to start this process is to remove the top skin that might have a friend on the creme brulee. Next, remove the unset custard on the ramekins, and we recommend you use a rubber spatula for this process.
Step #2. Pour the Custard and Work On It
The next step is to pour the custard into your metal strainer. Remember to set a bowl below the strainer so that it captures any dripping custard. Get your spatula and use it to get through the custard.
Doing this will break down the grainy sections of the custard and make it much smoother. Keep up with this process un until the base of the custard becomes smooth.
Step #3. Heat and Stir the Custard
Once you achieve the smooth custard base, proceed to bake it using slow heat. To achieve the best results, change the base to a double boiler. Once this process is complete, keep on stirring until you get the best results.
Ensure you stir until the custard base becomes hot, but be careful so that it doesn’t overheat. Regulate the heat, especially before it gets to the 160 degrees Fahrenheit temperature level.
Step #4. Set the Custard in New Ramekins
The next step is to pour the custard on top of the ramekins and then move to use the hot water bath. Ensure you move to this process only when the ramekins fill up. You will have to set the ramekins on an amply sized pan for this process.
Next, add some hot water to the pan until it gets to the same level as the ramekin. The hot water bath is essential in this process because it helps set the custard and its consistency.
Step #4. Bake the Custard Once More
Once the hot water bath is complete, proceed to the rebaking process. You will need up to 280 degrees Fahrenheit to ensure the best results during this step. You may have to set aside up to 30 minutes at first for this process.
Once the time lapses, evaluate it to determine whether the custard has set as required. If it hasn’t, proceed to bake the pie for ten more minutes for the best results.
The other convenient technique you can use is to evaluate the internal temperature of the creme brulee. The ideal temperature should average at most 175 degrees Fahrenheit. A thermometer will be helpful for this process.
If you don’t plan on working your creme brulee anymore, consider creating a new one. We suggest you be cautious in tracking the specific aspect that went wrong in this process. You should also consider the tips we have mentioned in the other guides for the best results.
Remember to stop baking the custard when you notice it setting around the edges.
However, ensure that the Creme Brulee is also wiggly around a central area. If this is the case, then your Creme Brulee is complete. Complete this process by setting the Creme Brulee in the fridge.
Creme Brulee Recipe – Things You Should Consider
Below is a general guideline on things to consider when preparing a Creme Brulee. To save time and effort, ensure you floor all the steps we recommended earlier. It’s a simple process, and the following are the things you should consider for the best results:
- Start with is to use a sufficient amount of egg yolks to create the custard base. If you prefer thick cream, consider using the 4:1 ration level for the best results.
- Remember to use a hot water bath to set the custard. Be keen on regulating the amount of water you use for each process. You can also pour the water once you place ramekins inside the pan and into the oven.
- Remember to add some egg yolks if you still want to use coffee when preparing the custard for your creme brulee. Failing to do this will harm the quality of your creme brulee.
- The ideal custard recipe should contain essential ingredients like vanilla, salt, and sugar. Avoid other ingredients, especially if you are still new to preparing creme brulee products.
You should now be more prepared to address the creme brulee not setting issue. The key to success is to use the ingredients and respect the process. With a little bit of practice, you should find it easy to prepare one minus the hassles you experienced in the past.

- How Long Does Vegan Butter Last? Mystery Solved - January 9, 2024
- How Long Does Vegan Mayo Last - January 2, 2024
- From Pot to Plate: How Long Does Vegan Chili Last in The Fridge? - December 26, 2023


 Bottom Pie Crust Not Cooked – Top 9 Solutions Defined