Cheese is love! But we struggle a lot to get the perfect cheese for our purpose. The most common one we recently hear for pizza is low moisture mozzarella.
Considering a lot of factors, low moisture mozzarella is better to use.
So you’ve been asking how to make low moisture mozzarella?
Well, you have to first make the cheese curd. And then, cook the curd on the stove. After that cut the curd and microwave it. Finally, stretch your mozzarella and shape it as you like. Then just eat it as you wish.
But that’s just a glimpse of the low moisture mozzarella-making process. To get an actual idea, scroll through the sections.
Can You Make Low Moisture Mozzarella at Home?
Well, you can make it at home. Before emphasizing that, let’s tell you what is low moisture mozzarella cheese? Well, it’s simple mozzarella cheese with less moisture. The water content here is really low compared to fresh ones.
The making procedure has some differences for both types of mozzarellas. But the thing is you can make low moisture mozzarella at home. Or you can buy some fresh mozzarella and turn it into dry mozzarella. So even if it isn’t low moisture, you can at least make it less watery at home.

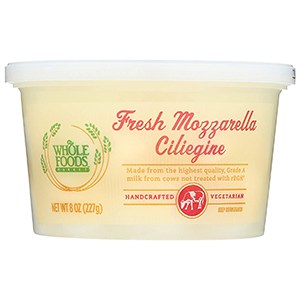
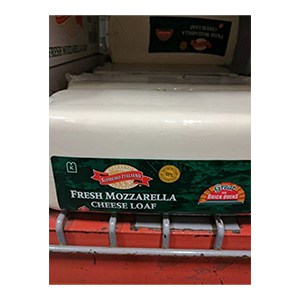
Start with purchasing some fresh mozzarella. Now when buying you should focus on the quality of the cheese. If you need our assistance, then here’s what we suggest.
Whole Foods Market, Fresh Mozarella Ciliegine
Supremo Italiano Fresh Mozzarella Loaf
After you get the cheese, it’s time to make it less watery. But don’t get too worried. Because it’s not as hard as removing a point from flat on your brisket. So let’s look into the steps.
How to Make Fresh Mozzarella Dry?- 2 Easy Steps!
We already know that you can turn fresh mozzarella into a dry version. But for that, you’ll need to do some work. Hence the following steps are mentioned.
Step 1: Drain The Cheese
The first step is to drain the juices that come with the mozzarella cheese. For that, you’ll have to open the container or plastic bag that comes with the cheese. Remove the ball of cheese from within.
Now, remove any extra water with your hands. Then just rip the big cheese ball into 3-4 smaller pieces. Try to squeeze very lightly and see that some of the moisture will be removed. Now take a bowl and a fine strainer.
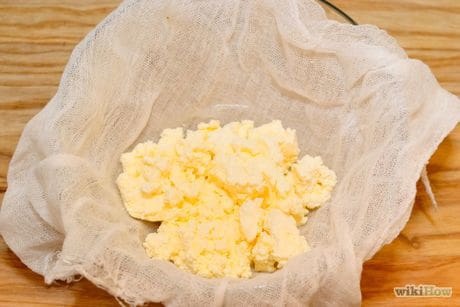
Then put the cheese pieces on the strainer and place the bowl above that. Now place them in the freezer overnight. By this time, the cheese will drain any excess water. After that, take it out from the freezer and give it another light squeeze.
Step 2: Dry The Cheese
Now cut the ripped cheese pieces into potato wedge-type shapes. Then place them over a kitchen towel. You can even use butcher paper instead of a kitchen towel.
But don’t get confused with your butcher and kraft paper. Because butcher paper is what you need as it has a higher moisture absorption ability.
Now you have to keep it that way for 15 minutes. But you may not use the mozzarella right now. Then you can place it in the freezer for another 2-3 hours like this.
Just take it out when you need to use it. If you have leftovers, store them in an airtight container. So that’s what you do to dry the fresh mozzarella cheese.
But what if you want to actually make a low moisture mozzarella from scratch. Well, in that case, you’ll have to read the next segments.
Why Should I Choose Low Moisture Mozzarella?
There are a few good reasons to choose low moisture mozzarella over the fresh one. So let’s show a quick review first. We will also guide you to the details.
| Factors of comparison | Fresh Mozzarella | Low Moisture Mozzarella |
| Price | Costly | Cheap |
| Shelf Life | Low | High |
| Flavor | Less intense | More intense |
| Meltability | Medium | Low |
So now let’s look at the details below.
Cheaper Option
Well, low moisture mozzarella is actually cheaper in a sense. Due to low water levels, it’s easier to transport. And you can purchase it in larger quantities. That makes it a more cost-effective option.
Extended Shelf Life
Well, shelf life is important for cheese. So when the cheese is dry and less watery, it has a higher chance to stay well.
But what happens when the cheese gets bad? Well, the water separates. And the cheese has a change in its texture with a foul smell.
So when the cheese has less water it goes a long way. For example, fresh mozzarella is best to use the day it’s created. But it deteriorates quickly after that. And it builds up off-flavors within a few days.
On the other hand, low-moisture mozzarella can be kept refrigerated for 4 weeks. That means it has a longer shelf life than the fresh ones.
Less Water And More Cheese
We’ve mentioned that low moisture cheese has less water. Now let’s tell you the exact ratios. It has only 45% moisture content. Whereas, fresh mozzarella has up to 60% moisture content.
So if you purchase 500 grams of low moisture cheese then here’s more cheese than water. And the thing is you get less cheese if for 500 grams of fresh mozzarella.
So having more cheese is always an advantage.
Dense And Saltier Taste
As low moisture cheese is almost pure fuller cheese, the taste is denser. That means you can use it less than you need to use fresh cheese.
While adding it to any dish, remember that it will be saltier and more cheesy.
Higher Meltability
Meltability is the number one priority when it comes to mozzarella. We want our cheese to melt and cover our pizza in a thick, gooey blanket.
Now that’s not what we always get. A major flaw is the production of the crust too early. But that’s not a problem with low moisture mozzarella. As it’s more cheesy, it spreads and melts quite easily.
How to Make Low Moisture Mozzarella? – 5 Easy Steps!
This is a long process but we’ve tried to make it as easy as possible for you. So you might want to bookmark the article and check it out anytime for the next steps.
So let’s get started. Before that, here’s a list of tools you’ll need.
- Bowl
- Pot
- Spatula
- Thermometer
- Kitchen towel/butcher’s paper
Now, let’s look at the ingredients:
- 1 cup water
- 1.5 teaspoons citric acid
- 1/4 teaspoon of liquid rennet
- 1-gallon milk (whole or 2% non-pasteurized)
- 1 teaspoon kosher salt
After getting the tools and ingredients, hop into the steps.
Step 1 of 5: Make The Curd
The first step is to make the curd. For that, you’ll have to make the citric acid and rennet solution.
Let’s guide you on how to do that. Take 1.5 teaspoons of citric acid and mix it with 1/2 cup of water. Stir them until they’re dissolved. Now take another separate bowl. Pour 1/4th cup of water in it. Then add 1/4th teaspoon of liquid rennet. Mix until they’re dissolved.
After that, take a pot and warm up the milk to 90 degrees Fahrenheit. Add the citric solution to the milk and stir.
Then, turn off the heat and add the rennet solution to the milk, and stir. Now cover the pot and let it rest for 5 minutes. In between this time, don’t move the pot.
Then move to the next step.
Step 2 of 5: Cut The Curd
When you uncover the pot, you’ll see that the milk has turned into a tofu-like substance. If you see that it’s still in liquid form, wait for another 5 minutes.
Now here’s the difference between fresh cheese and low moisture cheese. You’ll have to let the curd set for about another 30 minutes. This will help it to become more citric and dense.
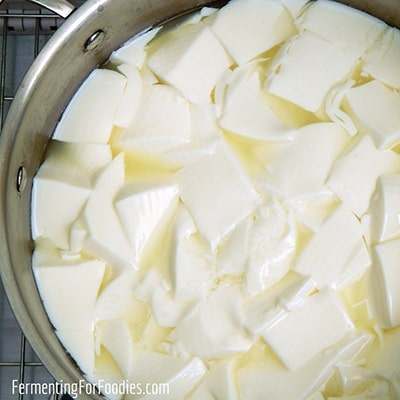
That means the longer you wait the denser the cheese becomes. In that sense, low moisture cheese is denser.
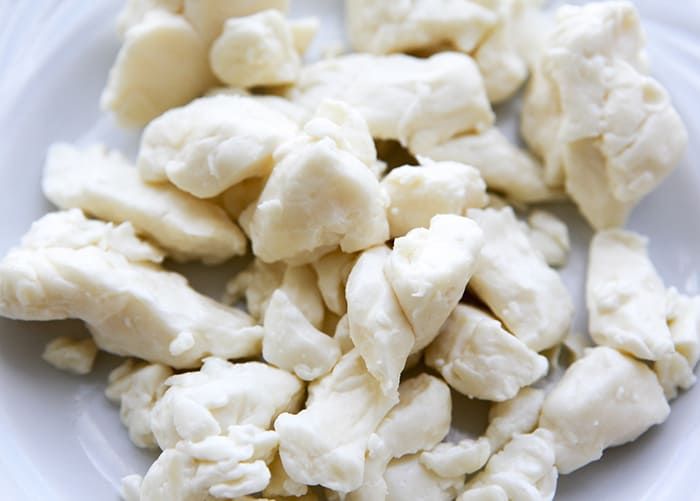
Once the time is over, take a deep knife and cut the curd into your preferred shapes. But we prefer cutting them into 3-4 inches pieces. After that, start with the next step.
Step 3 of 5: Cook The Curd
Return the pot to the stove and heat the curds to 105°F over medium heat. Slowly stir the curds while they’re warm. But be careful not to split them up too much. The curds will eventually clump together and separate from the yellow whey as much as possible.
Now turn off the heat and keep stirring for another 5 minutes. Now it’s time to separate the curd from the whey.
For that, take a spatula and pour the curd into a microwave-safe bowl.
Step 4 of 5: Microwave The Curd
Now microwave the curd for a minute to get rid of the remaining whey. After that, microwave it again for 30 seconds. The temperature should be 130 degrees Fahrenheit.
At this stage, insert a thermometer on the curd. And check if the internal temperature is the same.
If it’s 135 degrees Fahrenheit, wear a glove and stretch the curds. If not, then heat it up for another 30 seconds.
Step 5 of 5: Stretch to Shape the Curd
Now take the curd on a plain surface. Sprinkle salt on it and stretch the curd then fold. Keep repeating it until you feel the curd is being tightened.
After that, you’ll see that the texture is firm and the outlook is shiny. Then it’s time to shape your mozzarella.
You can shape it in one large cheese ball or two smaller cheese balls. That’s completely your choice.
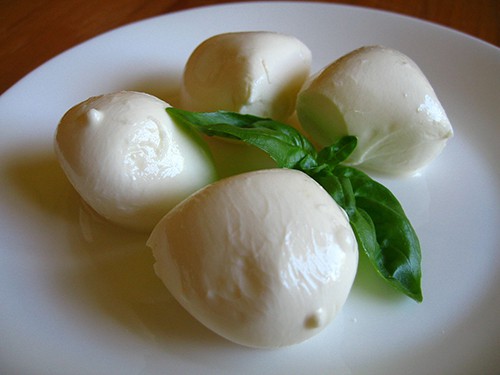
Now your mozzarella is ready to use. Or you can refrigerate and use it later when needed.
See, making low moisture mozzarella is no big deal. With a few steps, you’re done with your own version of low moisture mozzarella.
Now you may still think that why should you go through all this trouble and make low moisture mozzarella. Well, we’ve mentioned the reasons just below this segment.
FAQs
Question: Is there any other way to alternate the microwaving process?
Answer: Yes, there is. You can steam the curds to give it a similar effect. For that, take one pot and boil water in it. Then place the curd pot over it and cover the whole thing with a lid. This should steam the curd.
Question: Can I use goat milk for low moisture mozzarella?
Answer: Yes you can. Any milk with a 2% skim can be used to make the cheese. So it won’t matter if it’s cow or goat’s milk.
Question: How to make my homemade cheese melt better?
Answer: Well, store-bought ones are always melting better. But to have that effect you can use whole milk while making the curd. That melts better.
EndNote
We’re at the edge of this article, you learned a lot about how to make low moisture mozzarella. Hope you share this knowledge with your friends.
And if you have any cheese hacks, do share them with us in the comments section.
Thank you!
- How Long Does Vegan Butter Last? Mystery Solved - January 9, 2024
- How Long Does Vegan Mayo Last - January 2, 2024
- From Pot to Plate: How Long Does Vegan Chili Last in The Fridge? - December 26, 2023






 How to Use a Pizza Screen? [4 Easy Steps]