Let’s face it, getting gluten-free bread can sometimes be pretty hard. Not all shops have it. Most shops feature bread that includes gluten. So here’s what you can do: make your own.
By baking the bread yourself, you can have it anytime. And you know what’s going inside. You can simply substitute some components if you have dietary restrictions.
Contrary to what you may think, baking gluten-free bread is pretty easy. All you need is a few ingredients. And so we noted down a recipe that is easy to follow for anyone. It’s delicious and super easy to make.
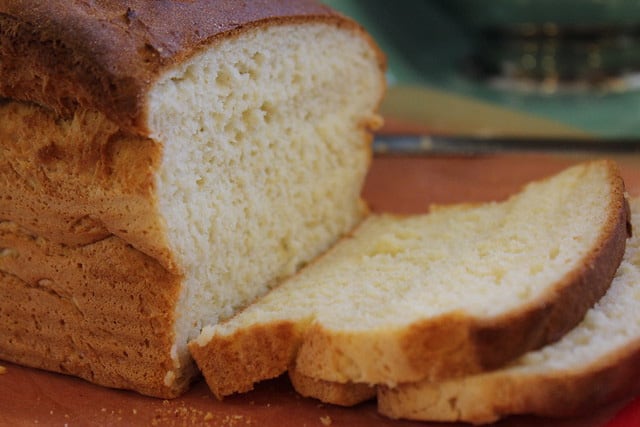
- Level: Intermediate
- Serving Portion: 1 loaf (16 slices)
- Preparing Time: 20 minutes
- Rising Time: 25 minutes
- Baking time: 30 minutes
- Total time: 1 hour 15 minutes minutes
Nutritional Facts( Per Slice):
| Calories | 110 |
| Fat | 4g |
| Saturated fat | 0g |
| Carbohydrate | 17g |
| Protein | 4g |
Necessary Cooking Ingredients
Apart from the ingredients, you will need two cooking tools for this recipe. They are-
- 9×5 inch loaf pan
- Electric mixer
Ingredients
- 1 tablespoon of active dry yeast
- 2 large eggs, room temperature
- 2 tablespoons of sugar
- 1 cup of warm fat-free milk (110° to 115°)
- 3 tablespoons of canola oil
- 1 teaspoon of cider vinegar
- 2-½ cups of gluten-free all-purpose baking flour
- 1 teaspoon of unflavored gelatin
- 2-½ teaspoons of xanthan gum
- ½ of teaspoon salt
How To Make Gluten-Free Bread
You may need to run an errand for a few of the ingredients. Once you get them ready, follow these steps.-
Step 1: Prepare Dough
Before we start making the dough let’s get the yeast mixture ready. Combine the yeast, sugar, and warm milk in a small bowl. After that, put it aside. Make sure you’re using high-quality yeast. Using yeast that has gone bad will result in bad bread.
Take another bowl and mix in the eggs, oil, and vinegar. Along with the yeast mixture. Use a mixer to whisk all the ingredients. Then gradually pour in the flour, salt, gelatin, and xanthan gum. Keep whisking while pouring them.
To ensure a smooth texture you can mix the dry ingredients in a separate bowl. Sift them using a sifter before mixing them with wet ingredients.
Beat all the ingredients at a low speed for about a minute. Then shift it to a medium speed and beat it for around two minutes. The dough should be softer than any yeast bread dough with gluten.
Step 2: Transfer Bread And Let It Rise
Once the dough is ready, transfer it to a greased 9×5” loaf pan. Use oil, butter, or grease spray for this step. Then sprinkle it with gluten-free flour.
Use a wet spatula to even out the dough in the pan. Cover the pan and place it in a warm location. Let the bread rise until the dough reaches the top of the loaf pan. It should take about 25 minutes.
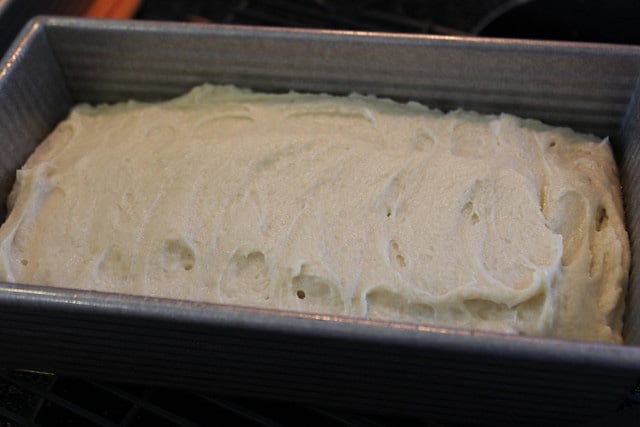
Step 3: Bake And Enjoy
In the meantime, preheat the oven to 375 degrees Fahrenheit. Once the dough is ready, loosely cover it with aluminum foil. Bake for 20 minutes after transferring it to the oven. Bake it till it gets a shade of golden brown. If necessary, bake for an additional 10-15 minutes. When done, take it out on a rack to cool it down.
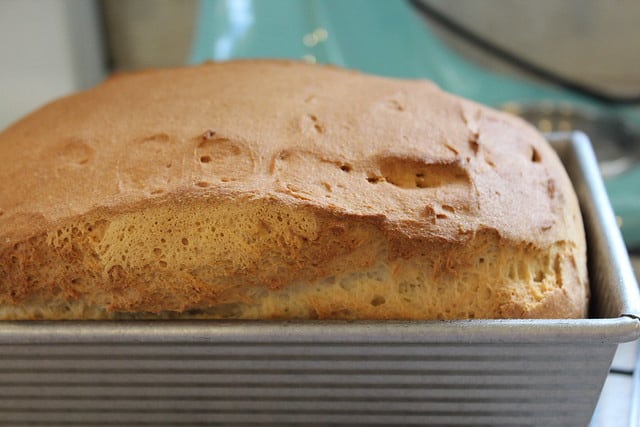
And all done! Now you can enjoy your freshly baked gluten-free bread with any sides you want.
Some Important Tips
Check out the following tips for a better understanding of our recipe.
Why Won’t Your Gluten-Free Dough Rise?
Gluten-free flour is inherently heavy and dense. So, if it is added to bread dough, there will be heaviness and denseness. As a result, the bread won’t rise. This is why your gluten-free bread won’t rise much. Unlike conventional gluten-free bread dough.
How Do You Make Gluten-Free Bread Rise?
Using good quality yeast and letting it rise properly should do the job. But another way to do so is by turning your oven to 200 degrees Fahrenheit. When the oven reaches this temperature, turn it off. Then place a small baking pan partially filled with hot water on one of the shelves.
What Can You Use Instead Of Milk?
If you are lactose intolerant or prefer avoiding milk, you can swap it with any plant-based milk. It’s a good alternative that won’t largely alter the taste of your bread.
Why Is Your Homemade Gluten-Free Bread Gummy?
Your homemade gluten-free bread may appear or taste gummy for quite a few reasons.
A lot of the time, it’s due to an incorrect flour-to-starch ratio. Which is a more difficult issue to solve. But, more often than not, it’s a simple issue like baking or mixing time.
How To Store Gluten-Free Bread?
Any gluten-free bread that has been out for more than 3 to 4 days should be frozen (depending on humidity levels in your kitchen). Cover bread tightly in a freezer-safe wrap to avoid freezer burn due to moisture loss.
We hope you liked our recipe. We made sure to elaborate on every step so that you can carry it out easily.
- How Long Does Vegan Butter Last? Mystery Solved - January 9, 2024
- How Long Does Vegan Mayo Last - January 2, 2024
- From Pot to Plate: How Long Does Vegan Chili Last in The Fridge? - December 26, 2023







 No-Fail Cornbread Recipe For The Perfect Thanksgiving Dinner